Microsoft Word and Excel offer a very wide range of features for managing, analyzing, and preserving data. Navigating these tools efficiently requires knowledge, and that’s where Microsoft Office cheat sheets come in handy. On this page, you will find Microsoft shortcuts, free cheat sheets, and essential tips prepared by Custom-Writing.org team.
Learn how to work with tables, edit documents, format texts, and perform other key functions in Microsoft Office with our shortcuts cheat sheets! Don’t miss out on the expert tricks to help you make the most of Word and Excel, with handy MS Office cheat sheets for unlocking the full potential of these programs. From mastering formatting in Word to creating formulas in Excel, we’ve got you covered!
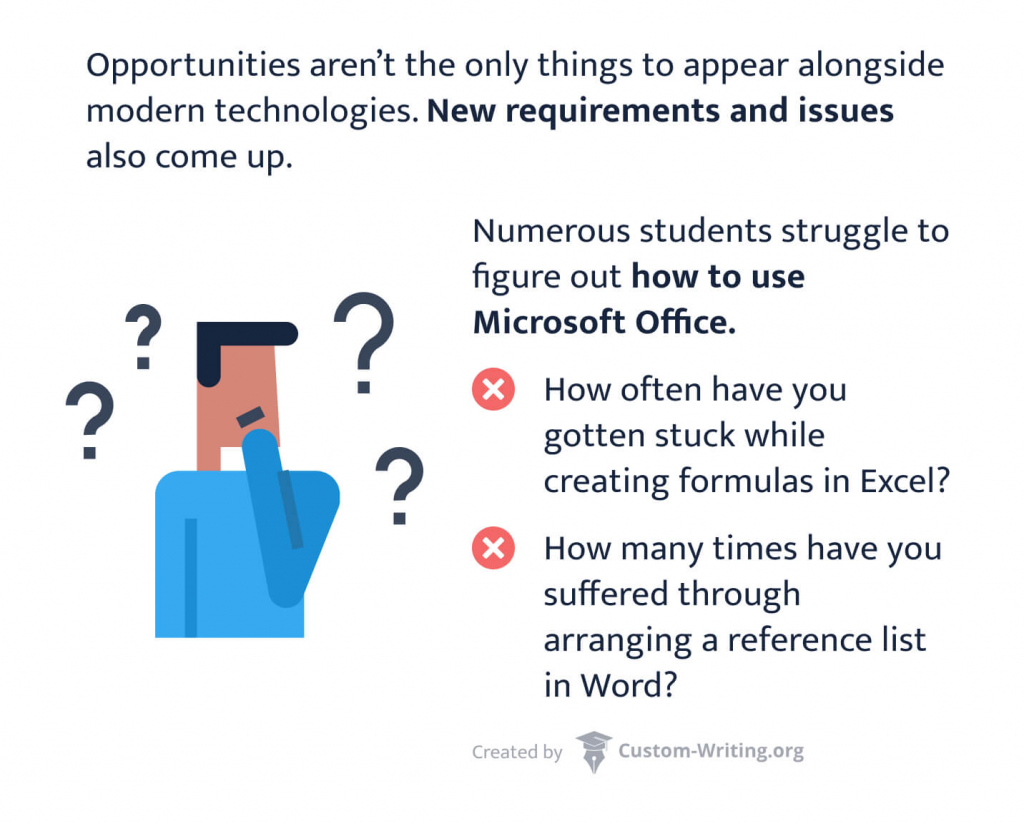
Luckily for you, our team has compiled this excellent cheat sheet for Microsoft Office. We’ve gathered the most useful tips and keyboard shortcuts for the various Microsoft programs. With their help, you’ll be able to use Microsoft Office in your studies without any issues.
⌨️ Crucial Keyboard Shortcuts for Students
As we’ve already brought up, Microsoft Office is the most widely used office suite. It’s applied considerably in business and education. MS supports the education sector by providing a free Microsoft Office 365 version for students and educators.
Most people have Microsoft Office software, so we’ve chosen to offer a list of essential, universal keyboard shortcuts for this program. They are helpful for those who deal with computers in general, and they’ll certainly assist you with MS.
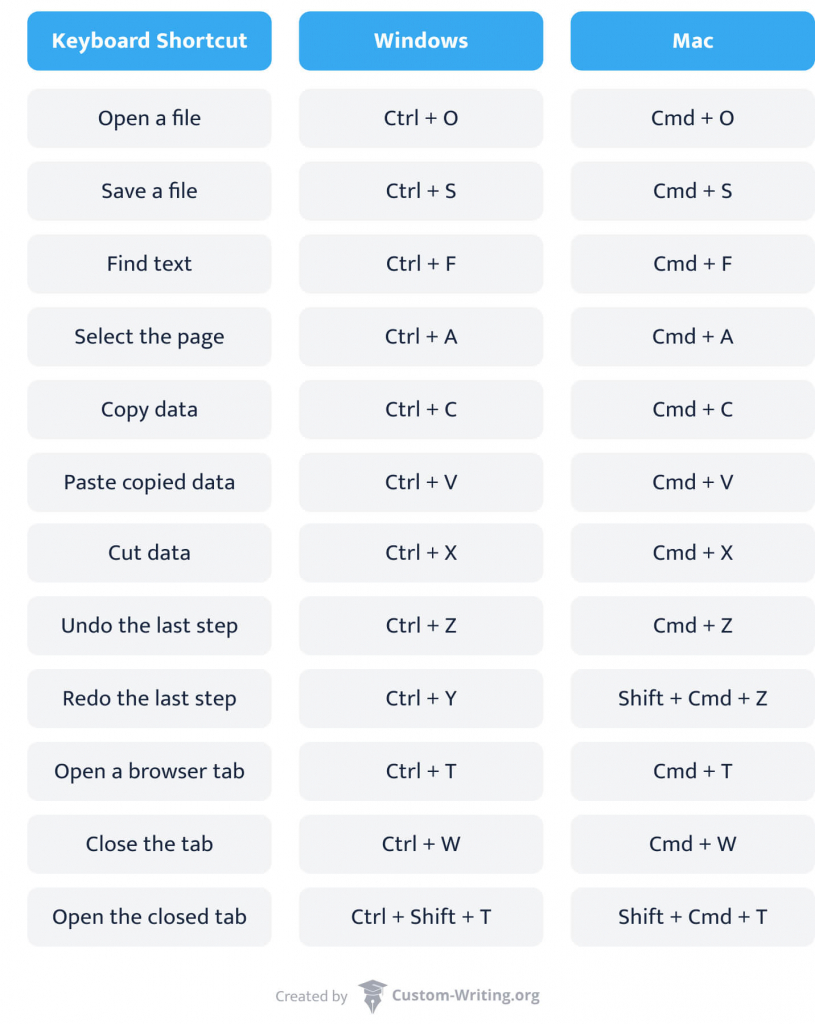
In the rest of the article, we’ve noted down shortcuts for Windows. However, as you will see, they’re helpful for Mac too. All you’ll have to do is to replace the Ctrl button with Cmd.
✍️ Word Cheat Sheets
The first Microsoft Office program that a great deal of students employ is MS Word. That is where most essays and other papers are made. If you’re not already, you will likely be dealing with Word throughout your education. So, it will be advantageous to learn cheat sheets for this program.
In the following segments, we have presented a list of valuable tips that will make your experience better.
1. Basic Keyboard Shortcuts
To work in Word without a struggle, you should begin by finding out the keyboard shortcuts. There are dozens of configurations, and you can also register your own. Here, we’ll list the basic shortcuts that will help you work efficiently with your documents.
2. Essential Keyboard Shortcuts: Editing Text
After looking at the basic shortcuts, let’s get to the good part. Knowing how to work with text is fundamental to using Microsoft Word. The combinations listed here are essential to quickly and efficiently edit your document, which is crucial for effective academic writing.
3. Working with Tables: Key Tricks
Besides working with text, Microsoft Word is also efficient at producing tables. These are multifunctional tools helpful in storing sizeable amounts of information. Here, we have outlined the best ways to insert, organize, and master your tables.
How to Create a Table
There are several methods of creating a table in your Microsoft Word document. Start with going to the Insert tab on the ribbon bar at the top. Locate the Tables menu and click it.
You will immediately notice that there are multiple choices available:
- You can insert a table via the grid. This approach is helpful to visualize what the result will look like. Unfortunately, the maximum size of the table you can make this way is 10×8 cells.
- If you need a more extensive table, your best choice is the Insert Table menu. That’s where you can manually indicate the amount of rows and columns. The max dimensions of a table inserted this way is 63×63 cells.
- If your table is not standard and you need room to play with rows and columns, Word has options for you. If you head into the Draw Table menu, your cursor will transform into a pencil. Using your mouse, you can easily draw a table with the dimensions that you need. Left-click and drag down for columns; drag sideways for rows.
Table Tools Layout Tab
Microsoft Word is a helpful instrument for creating producing and arranging custom tables. In this part, you’ll find out how to format and change its content and layout. Below, we have outlined some functions that will be handy in your work.
- Table Properties:
- Table – Essentially, a table is a grid made up of rows and columns. It is useful for exhibiting and ordering information.
- Row – The horizontal line in a table.
- Column – The vertical line in a table.
- Cell – The intersection of a row and column.
- Alt Text – A text-based description of the contents of the table. This is handy for people with visual impairment or in situations where the table doesn’t load. To add alternative text into a table, right-click the cell and navigate to Table Properties. In the dialog box that pops up, click Alt Text and fill in the information.
- Insert row or column – Navigate to the Layout tab. Click on Insert Below/Insert Above to add a row. Click on Insert Left/Insert Right to add a column.
- Delete row or column – Navigate to the Layout tab. To delete the selected row, click on Delete – Delete Rows. To delete the selected column, click on Delete – Delete Columns.
- Alignment – To adjust the position and alignment of text, navigate to the Layout tab. Select the needed cells and choose an option from the Alignment group.
- Merge – Cells can be merged or split up. To do so, navigate to the Layout tab and find the Merge Cells/Split Cells option.
- Convert text to a table (and vice versa) – Make sure that the data in the text is separated. Use commas or tabs to designate where to divide into columns and paragraphs to indicate rows. Pick the text you wish to convert into a table, then click Insert – Table – Convert Text to Table. Adjust the options in the dialog window. If you want to convert a table back into text, select the information first. Navigate to the Layout tab and in the Data group, click on Convert to Text.
- Autofit – Automatically adjust the size of your table. Go into the Layout tab and click on Autofit. Select the option that works best for your needs.
Table Tools Design Tab
After you finish with the content and the format of your table, you can change its design. Spending time on this may not be in your plans. However, the right design can raise your work to the next stage.
Here, you can check a description of the design features for your table.
- Table Style Options
Navigate to the Design tab after clicking on your table. In the Table Style Options group, pick the elements you want. - Table Styles
Direct to the Design tab. Browse through the Table Styles collection and select one from the gallery. - Shading
Choose a cell. Navigate to the Design tab and press on Shading in the Table Styles group. Pick a color. - Borders
Highlight a table. Get to the Design tab and choose Borders in the Tables Styles group. Decide on a border style.
4. How to Format: 10 Critical Rules
Every educational institution has its prerequisites for the structuring of text documents. You can figure out how to work with an assortment of styles. There are precise guidelines for such popular formats as MLA, APA, and Harvard on different sites.
See the ways you can format text in Word:
- Create lists. You can either make a bulleted style list or a numbered list. Find the Paragraph group in the Home tab. You will find three Bullets buttons: a bulleted list, a numbered list, and a multilevel list. Browse through the style gallery and decide on one.
- Align paragraphs. Highlight a paragraph. Make your way to the alignment option in the Paragraph group in the Home tab. Any section of your text can be left, center, or right-aligned.
- Switch colors, fonts, and sizes. Under the Home tab, find the Font group. Highlight the words that you need to alter or choose a setting before you start writing. Browse through the lists of possible font styles, sizes, and colors. You can also input a custom number for the sizes and select a custom color under More Colors.
- Clear or copy formatting. First, highlight the text. Then, find the Format Painter button in the Clipboard group of the Home tab. Choose the content you want the format to be applied to. Press Clear Formatting button to remove all formatting.
- Apply headers and footers. These are additional things that you add either at the top or the bottom of a page. Typically, they are used to specify extra info, such as the title of the paper, date of creation, etc. To add a header or footer, get to the Insert tab. Pick either the Header or Footer option under Header & Footer group.
- Utilize tab stops. There are 4 types in Microsoft Word: left-aligned, right-aligned, center-aligned, or decimal-aligned. To set one up, click on the place in the paragraph where you want to add it. Then, open up the Paragraph group’s dialog box and click on the Tabs button. Be sure to modify the tab stop position from there.
- Pick your margin size. Margins refer to the empty spaces at the edges of the document. To regulate their size, you will have to navigate to the Page Layout tab. Press the Margins button under the Page Setup group. You can pick the preset one or construct your own in Custom Margins.
- Display page numbers. Go to the Insert tab and locate the Page Number button under Header & Footer group. Numbers can be shown both at the top and at the bottom of the document.
- Use and format columns. Word allows you to split the text up into columns. You can find these under the Page Layout tab in the Page Setup group. Click on Columns and select the needed style. As a result, they will be applied to the whole document. However, you can adjust this under More Columns.
- Set the spacing. You can change line spacing and paragraph spacing. To do so, select the text that you want to change. Under the Paragraph group in the Home tab, find the Line Spacing option and adjust accordingly. To adjust paragraph spacing, navigate to the Paragraph group’s dialog box. In the Indents and Spacing tab, find the Before and After values.
📊 Excel Cheat Sheets
Many research papers, especially on technical matters, need calculations and the handling of significant data volumes. Microsoft Excel is the ideal choice for reaching these goals. Students can use this software in multiple ways, and our cheat sheets from the following parts can show you how. You can also check how to write a research paper for additional tips.
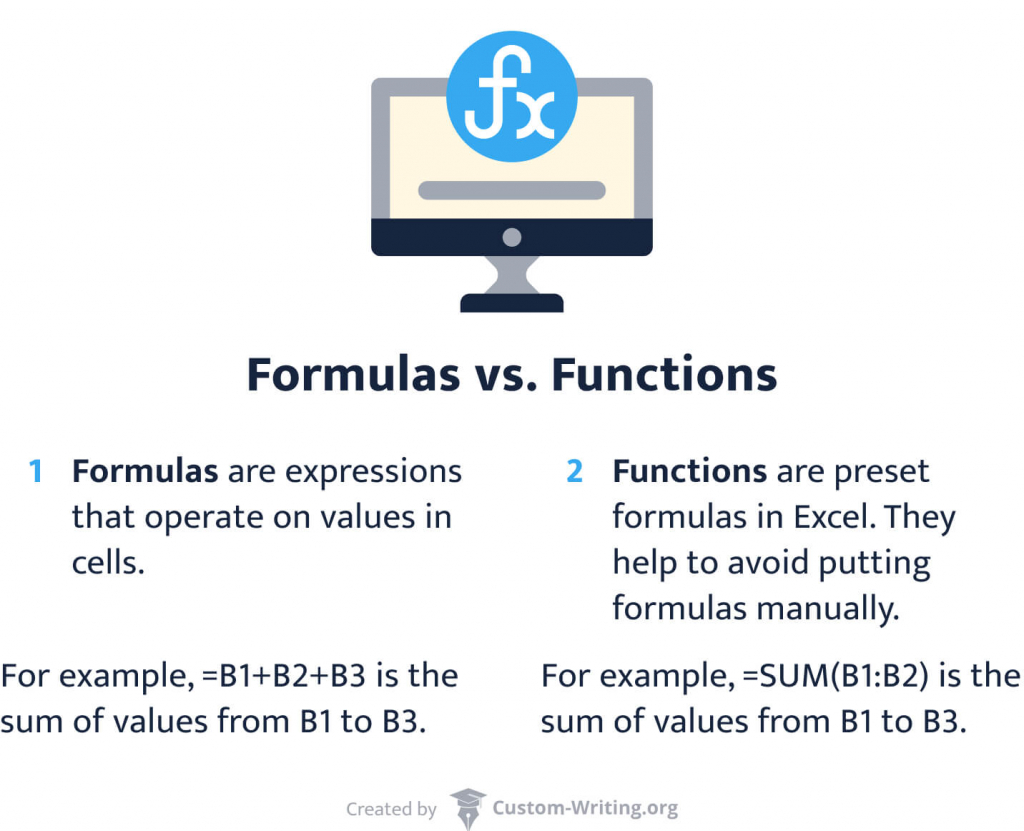
There are two terms that you should familiarize yourself with: formulas and functions.
5. Key Excel Functions & Tricks for Students
A function in Excel is a process that helps with logical, mathematical, and statistical operations. It is a quick way to find the sum, average, count, etc. Students should get a grasp on just some of them as that will significantly assist them in their academic life. The rest of the Excel functions can be helpful in business or at work.
Excel Functions You Need to Know
- SUM is one of the most often used functions in Excel. It sums up values across several columns or rows. For instance, =SUM(A1:H1) is a selection that sums the value of rows. You can also turn the function into a formula.
- IF is utilized when you need to arrange your information in a particular manner. You can also include formulas and functions if it serves your purposes. For example, =IF(A2<D4, “TRUE,” “FALSE”).
- SUMIF sums up the values in a given range that meets particular criteria. For instance, a column contains numbers, and you want to calculate only the values equal to 1: =SUMIF (A2:A45, “=1”).
- VLOOKUP stands for “vertical lookup.” This process does a search in the sheet for a certain value in a column. It brings the matter from different columns into the same row. E.g., =VLOOKUP(“London,” A1:C90,2, TRUE).
- INDEX/MATCH are two functions that are usually combined for advanced lookups. To use this formula, type =INDEX($B$2:$B$8, MATCH(H12,$C$2:$C$8,0)).
- MAX/MIN are other vital functions in Excel. MAX helps you find the highest, while MIN – the smallest number in a range. While searching, the functions will miss empty cells. Here is how you can use them: =MIN (or MAX) (number 1, {number2}, …)
- COUNT in Excel counts numbers in a given range. It can look like this: =COUNT(B1:B20).
- COUNTA will count cells that contain information. To use this function, you need to determine the cells that you want to include. For instance: =COUNT(A1:A7)
- COUNTIF is a statistical function. It calculates cells in a scope that meets a determined condition. For instance, it can quantify the number of times some data pops up on the sheet. An example: =COUNTIF(A1:A5, “1990”). This function lets you understand how many times “1990” is brought up in the spreadsheet.
- AVERAGE in Excel will find the average of the numbers or values. It adds all the figures and then decides the result by the overall amount of data. Here’s an example: =AVERAGE(B1:B10).
Tricks for Using Functions Like a Pro
Mastering functions is a vital component of understanding how to use MS Excel like a professional. Here, you’ll read about how you can use the functions that we’ve discussed:
- Use ALT+= to enter a sum automatically. Select the column and keep pressing ALT. Then, type + and =. It will quickly give the sum of the column’s contents.
- Click CTRL-` to demonstrate formulas in a worksheet. Hold the control key and at the same time click “`”. This way, you’ll display all the formulas. To hide them back, click the same combination again.
- Try the Automatic Calculation. Be careful using this process. Every time you alter the spreadsheet, Excel will re-calculate the formulas. It is very convenient, as it means your data stays up-to-date. If you want to switch off the Automatic Calculation, go to options and select formulas to view the Calculation options.
- Consider using the Quick Aggregation Tool. It can demonstrate aggregated statistics, such as Average, Numerical Count, Max, Min, Sum, and Count. For that, just select the rage without entering any formula. Excel will show these stats automatically.
- Convert numbers to a range. The LOOKUP function can help you to convert numbers to ranges for simplifies summary. To convert numbers, you should use [range_lookup]. For instance, you have some values in a Column, and you want to convert them into specific ranges. For that, follow simple steps: create a table and its fields, and enter the function.
- Count numbers in a range. If you want to quantify how many numbers fall into a specific span, you can try several methods: fixed and dynamic. Imagine you have a spread of numbers in B1 to B100, and you want to know how many values are between 10 and 30. For that, enter the function into the formula bar, =COUNTIFS(B1:B100, “>=10”, B1:B100, “<=30”). However, a dynamic method is better. You can change values, Excel will update the count. The formula for the dynamic count is COUNTIFS(B1:B100,”>=“&C2, B1:B100,”<=“&B3).
6. Helpful Excel Cell References
If you want to nail MS Excel, you have to understand more features than just functions. In this part, we’ve explained cell references. They will help you navigate Excel better and use it more effectively.
To use autofill in Excel, we want to introduce you to cell references. Below, you can see combinations of letters and numbers. A letter constitutes a column, and a number represents the row.
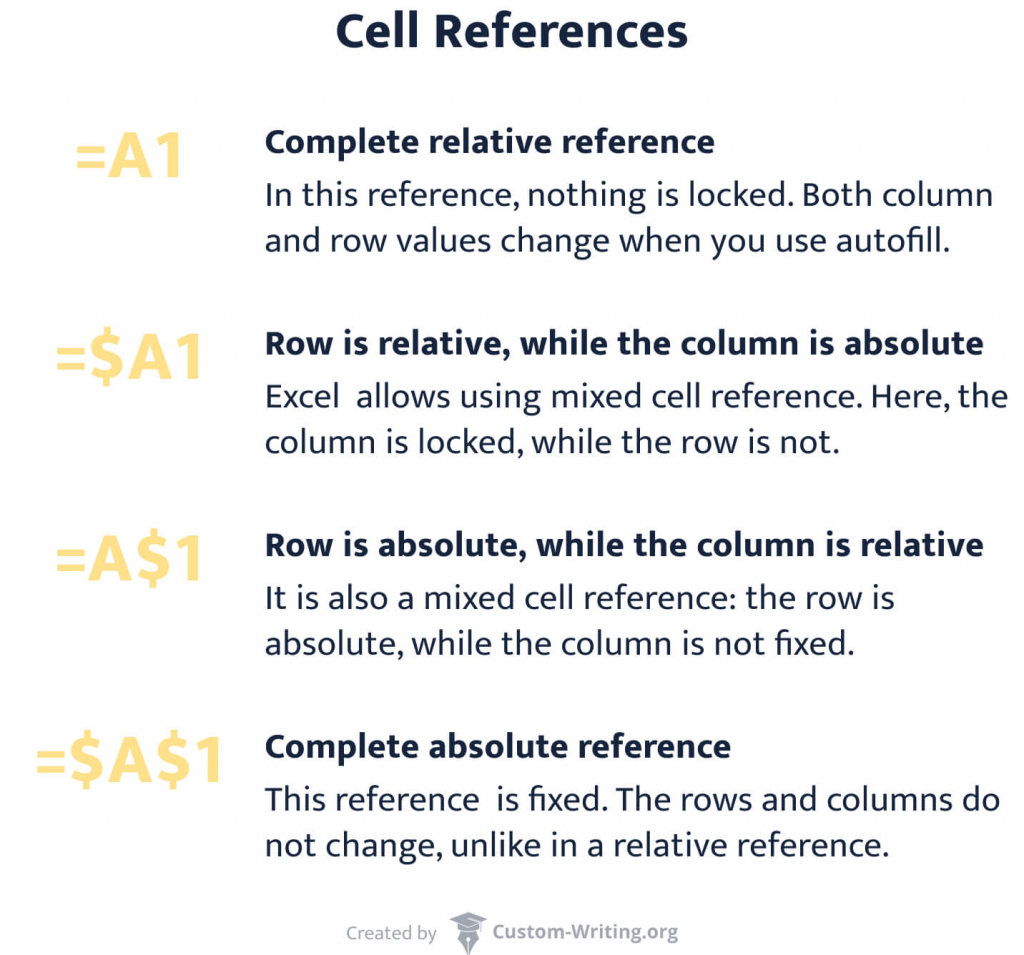
For instance, you want to change a simple reference in your cell into a relative consideration. For that, press F4. It will change the reference from A1 to $A$1.
7. Excel Keyboard Shortcuts That You Need
In any Microsoft program, knowing key combinations can make life simpler and any work process – faster. There are many of these combinations in Excel. You probably learned most of them already simply by using Word and other programs.
In the table below, we’ve gathered some Excel specific shortcuts:
8. Excel Formulas: Top Tips
The correct application of formulas is the key thing you have to learn. In this section, we will give you several tips on creating them in Excel successfully.
Not to make typos and mistakes in the formulas, you should remember this:
- Use (brackets).
You can avoid many mistakes if you follow this simple tip. Many errors happen with mathematical operations. Using brackets allows you to see each part of your formula separately and thus, exclude mistakes. Here is an example: =(B1+C2)/A5 - Include line breaks for complex formulas.
Getting lost and making unnecessary mistakes is a part of learning MS Excel. Thankfully, you can avoid numerous errors by just adding line breaks to your formulas. This way, it will be more manageable for you to detect all the mistakes and typos. - Utilize the Fill Handle to copy the formula to different cells on the spreadsheet.
You can select the Fill Handle and drag it down to the rows. It is the small square on the bottom right. If you use it, Excel will apply a function from one cell to all the other cells you dragged it. - Delete duplicate rows.
You can go into the Data menu and click on Remove Duplicates. To select a range that you want to remove the duplicates from, click Ctrl+A. Hit okay and enjoy the lack of copies. - Add leading zero.
Sometimes you need to add zeros to a number. To simply do it, use the following formula: =TEXT(A1, REPT(“0”,9)). The formatted number will have a text length of 9 characters. - Create named ranges.
If you have a large number of rows, it is helpful to give names to the ranges. It will allow you to refer to them using their titles instead of clicking and selecting them. To provide names, do as follows:- Click on the Formulas menu.
- Click on create from selection button.
- Select the ranges and name them.
- Add double quotes.
One of the best ways to include double quotes is the CHAR function. It will keep your formula readable and concatenated. ASCII Table can help you see what number you want to join. - Count unique values from a range.
Sometimes you need to see a count of unique values in a range. You can use a method of deleting duplicates. However, there is a quicker way to do it. For instance, you have your classmates’ names in A1:A20. In an empty cell you type a formula, =SUM(1/COUNTIF(A1:A20, A1:A20)). Instead of hitting Enter Key, you press Ctrl+Shift+Enter on Windows. It will create an arrow formula. You will see the desired result of how many unique names are in your class.
📝 OneNote Cheat Sheets
Today using a pen and paper for note-taking is not a common practice anymore. Students are switching to built-in text editors and online tools. Microsoft OneNote is especially popular. It allows you to structure the entire educational process, share notes, and change formatting by pressing several keys.
There are two versions of OneNote that can be used on one device:
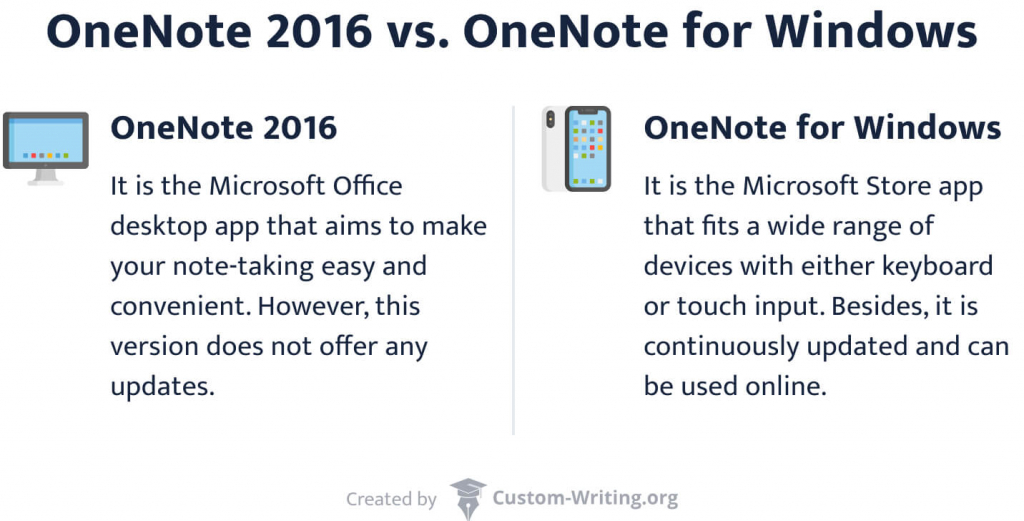
In the following sections, we’ll share tips for using OneNote. Keep in mind that there is also a free version of the tool. Although it doesn’t contain all the features of the Microsoft Office subscription, almost all of our cheat sheets will apply to it.
9. OneNote Keyword Shortcuts to Ease Your Studies
As with any other Microsoft Office program, OneNote can use standard shortcuts like Ctrl+V and Ctrl+C. Some sets may be unfamiliar for you, though. Yet, they are absolutely irreplaceable.
These OneNote keyboard shortcuts will save you a lot of time:
10. Crucial Tips for Students Using OneNote
We are sure that all of you will know how to take notes. If you are not a professional yet, you can read about effective note-taking. In the following section, we’ll show you how you can improve this process using OneNote.
To make your life easier, try the following note-taking strategies:
- Try hand-writing and drawing your notes.
Firstly, this will help you to memorize the material better. Secondly, this tip is beneficial when you need to plot a graph, chart, scheme, etc. To try it, create a new page, choose the View tab, select one of the available ruled lines, and enjoy your note-taking process. - Use page templates.
OneNote offers a variety of built-in templates (to-do lists, planners, schedules, etc.). Use them to save your time. Besides, with them, you can create an appealing background and a consistent layout. You can also add your personal template, customize it, and save it for future use. If you want to apply one, create a separate page for it. OneNote does not allow using templates on the excising document. - Record audio and video.
Audio and video recording is a unique feature of digital note-taking. With it, you won’t miss anything important. You can just come to your class, start recording, and relax. The entire lecture will be available for you, so you can relisten as many times as you need. - Work with different ongoing projects.
Take advantage of the wide variety of features OneNote offers you. Use tags to categorize and prioritize your notes. Share your documents with other people in real-time and edit them. Keep track of your projects, and don’t be afraid to get lost in your notes. - Take advantage of Outlook Flags.
Integration of OneNote and Outlook is the best thing for managing your deadlines and keeping track of your assignments. Create Outlook Tasks and add them to your notes. You will see how easily you can manage your tasks by setting reminders, marking them as completed, prioritizing them, etc. - Add rule lines and grid lines.
Do you miss an actual notebook with rules or grid lines? OneNote has a solution! In this app, you can add rule or grid lines. Plot your graphs and charts like you’re writing on the paper. - Employ Quick Notes.
Getting overwhelmed with all the tasks you have to complete? In this case, quick notes can help you. Take notes anywhere on any device. Type on your smartphone while on a bus, on a laptop while attending a class, etc. Your notes will synchronize and be available on each of your devices.
11. OneNote Class Notebook: How It Can Help You
OneNote Class Notebook is an improved version of the standard OneNote app. It is designed for use in the classroom and contains a wide range of useful features. For instance, students can collaborate and work on the assignments in groups and privately submit their papers. Besides, instructors can mark academic works and track their progress online.
Basically, OneNote Class Notebook includes all the features of the OneNote app and has some additional characteristics:
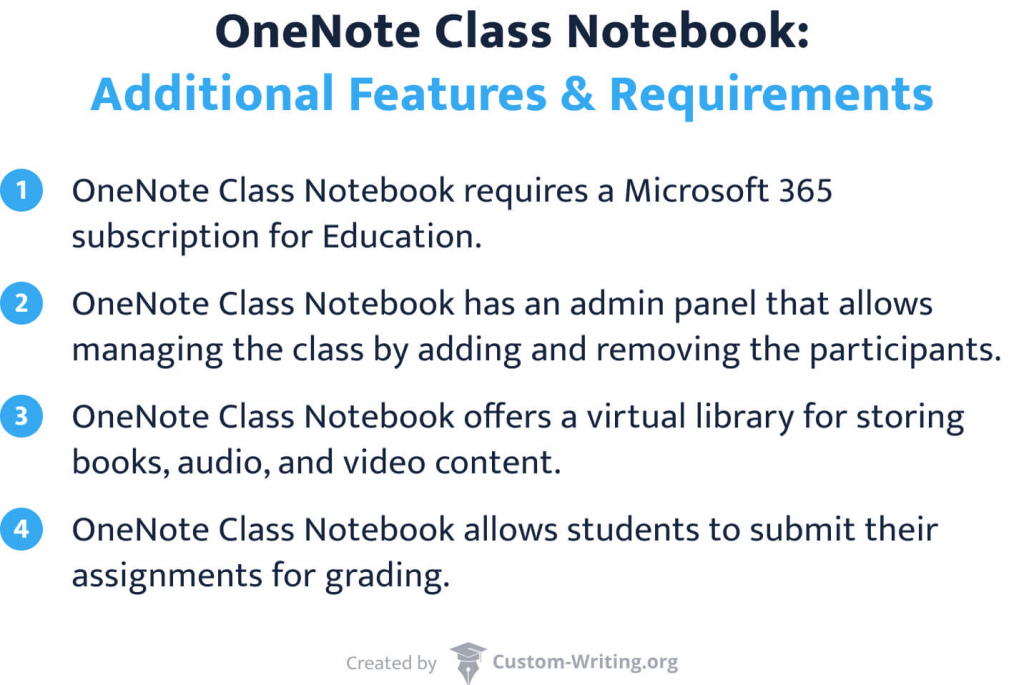
As a responsible student, you may suggest your instructor install OneNote Class Notebook. This will make your, your tutor’s, and your classmates’ life easier. Besides, it’s free for educational purposes.
Probably, at the very beginning, this program may seem too complicated to you. The tips below will help you to learn the basic principles of the OneNote Class Notebook:
- Inspect the content library regularly. It is the place where the professors can upload and store class materials for students. You can always access it and discover the materials. Check the library regularly to make sure that you don’t miss anything crucial.
- Save a copy of the lecture. To stay on track and always have access to the materials, you can record the entire class. Right-click on the title and select Save a Copy.
- Copy and paste PowerPoint slides. Instructors tend to display presentations while explaining the study materials. With OneNote Class Notebook, you don’t have to transfer the content to the pages in the app. Just copy and paste the entire slide.
- Share your notes with others. Sharing is caring! So, don’t forget to send your notes to your classmates. With OneNote Class Notebook, you can do it with one click.
- Break large assignments into sections. OneNote Class Notebook will help you to break huge tasks into small, more manageable ones. This way, you can study with much less stress.
- Enjoy your improved search feature. It allows you to search on a specific page, section, or even find a particular word. It will greatly save your time!
- Add questions to your page. Are you hesitating to contact your professor directly? Leave the comments and questions on your page as you complete the assignment. Your instructor will later see them and reply to you.
Pro Tip:
Microsoft Office provides many training videos on using OneNote and Class Notebook in particular. They are designed for teachers, but students can also master the program with their help.
📽️ PowerPoint Cheat Sheets
Plenty of people all around the world have to deal with presentations in their professional and educational lives. Professors and students alike use visual aids in demonstrating and organizing their material. There are hundreds of programs made for creating presentations. However, none of them are as popular, multifunctional, and straightforward as Microsoft Office PowerPoint.
We have prepared a guide with tips and tricks to using PowerPoint. We’ve also listed some keyboard shortcuts for editing and presenting. You can also check topics for successful presentations that can come in handy later.
12. PowerPoint Tips You Should Remember
Before we go any further, let us begin by giving you essential advice in creating content for your presentation. You need to realize how your slides should look like before we can move on to bigger things.
To create a memorable presentation in MS PowerPoint, you can follow these tips:
- Be consistent with your design and colors. While it is good to experiment, remember that a presentation must be clean and professional. Keeping a consistent theme allows your audience to focus on the message you are trying to convey.
- Add more images than text. A presentation is primarily a visual medium. Some text is essential, but filling up your slides with paragraphs will be distracting. Try to rely on images and use text only as guidance.
- Know who you’re creating it for. This is a crucial step in preparing any material. Your audience will frame the sort of design, layout, and content you use. Keep your target in mind when preparing your slides. Convey the information that will interest them.
- Display only essential, clear, and short texts. As mentioned before, words are less central than images in PowerPoint. Yet, they are still important. The information is best organized in bullet points, written in single sentences.
- Choose the font and size that can be viewed from afar. Your fonts should be readable and look professional. More importantly, though, they should be visible. You have to make sure that the font size you choose will be seen from afar.
- Use charts and graphs when possible. An effective way of organizing your information in an accessible fashion is via charts or graphs. Not only will it save you time, but it will also give your audience an easier way to interpret the data.
13. How PowerPoint Works: Key Tricks
We have covered how to organize your content. In this section, we will be moving on to how to create the actual presentation using the PowerPoint features.
Below, we have outlined some of the most useful functions that you can find in PowerPoint:
- Convert any document into a PowerPoint presentation.
Any Word document can be converted into a PowerPoint. This is an excellent function for saving time and organizing your information. Microsoft uses the Heading styles in Word to convert them to presentation. For example, Heading 1 will be converted into a slide title.
To use this function, navigate to Home and then New Slides – Slides from Outline. Find the file that you want to be converted into a PowerPoint in the dialog box. - Animate a flowchart (but not too much).
Flowcharts are visual representations of a step-by-step process. They are an effective way of categorizing complex information. An animated flowchart will allow you to discuss each point in detail as you go along, making your presentation dynamic.
To achieve this, select the first element of your flowchart. Navigate to the Animations tab and choose the desired animation. Plus, you can adjust the effect and timing for each step. Repeat this until every element of your flowchart is covered. Remember to keep it simple. You don’t want flashy animations to distract from the subject matter. - Add audio files.
PowerPoint is a powerful tool, and it has many functions some people never use. Plenty of students are unaware that it can support and play audio files. From background music to voice recordings, audio files in a presentation elevate the whole experience.
Click the Insert tab and go to Audio. You can choose an audio file directly from your computer. Or you can browse the Internet for a link. You can also set it up to play in the background or to play on click. The audio file will not play in the editing mode, so you will have to start the presentation to check if everything is in order. - Embed your fonts.
We have already mentioned the importance of a consistent design, so this presents an issue. To avoid that, PowerPoint has the option to embed fonts.
Navigate to the File tab and find Options. In the dialog box that appears, find Save and check Embed fonts in the file. Now all the fonts you used will be available to everyone who has the file. - Select multiple objects at the same time.
While designing a presentation, you might find that you need to move multiple things. Imagine you decided to add in an image. Now your text and flowchart don’t fit where they used to.
You can easily select multiple objects of different types (text, images, shapes, etc.) by holding down CTRL and clicking on them. You can also choose separate text in a single textbox. For that, hold down CTRL as well. This comes in useful when you want to emphasize certain words or phrases. - Modify different pictures on one slide.
Working with multiple images on a single slide can prove to be tricky. It becomes incredibly frustrating to adjust every image manually. Thankfully, there is a solution.
Select the images you want to work with by holding down CTRL and clicking on them. You can also pick all of the elements on the slide by pressing CTRL+A. You will see a Picture Tools menu appear. Underneath it, you will find the Format tab. Then, in the Picture Styles group, you will find Picture Layout. Browse through the library of available styles. - Align everything to establish symmetry.
Symmetry is an essential aspect of any effective design. Not only is it pleasant to look at, but it will also add professionalism to your presentation. We know that adjusting every element on every slide can be tiresome. This is why PowerPoint has an effective solution to align everything without hassle.
Hold down CTRL and choose the objects you want to align. Or you can press CTRL+A to select everything. In the Format tab, find the Arrange group. Click on the Align button and choose a suitable option. - Add invisible hyperlinks.
Hyperlinks can look particularly distracting in a presentation. This is precisely why it’s a handy trick. Making a link invisible will ensure that it doesn’t get in the way of your professional look.
We have to think outside the box to make this work. Go into the Insert tab, then Shapes, and add a small rectangle. In the Format tab, set the Shape Fill to No Fill and Shape Outline to No Outline. Now you have an invisible button, so to speak. You can either right-click or press CTRL+K to add a hyperlink. - Take advantage of the Format Painter button.
Nothing saves you time designing your presentation as much as the Format Painter function. It provides a quick alternative to painstakingly changing every element on every single slide.
Select the first object that you want to copy the format of. Click on the Format Painter button under the Home tab in the Clipboard group. Then, click on the second object. The design will be instantly copied over. If you want to change the format of more than one element, double-click the same button.
14. Top PowerPoint Keyboard Shortcuts: Formatting & Editing
Without doubt, the making of a presentation is a long affair. Knowing your way around keyboard shortcuts can save you a bunch of time. This part provides a list that will ensure your PowerPoint operations are much more agreeable and well-organized.
15. Keyboard Shortcuts That Will Save Your Slideshow
Editing and organizing a presentation is a complicated, prolonged task. However, for a lot of students, the most stressful part comes after everything is done.
The process of presenting can be a nerve-wracking event. This is precisely why these keyboard shortcuts will be handy to you during your slideshow.
🙋♂️ Microsoft Teams Cheat Sheets
At the onset of the COVID-19 pandemic, schools and universities searched for ways to continue providing education. Lectures and classes can transpire online but not without a specialized program. This is why Microsoft Teams became a real life-savior for numerous students and instructors alike.

Thankfully, it is easy enough to figure Microsoft Teams out – especially for tech-savvy students. However, we can still offer you some tips and tricks to make your experience smoother and more enjoyable.
16. General Microsoft Teams Keyboard Shortcuts
MS Teams is relatively different from other Microsoft Office programs. The typical set of keyboard shortcuts that you know won’t be of much use here. Here we have gathered new combinations to help you navigate much quicker.
Pro Tip:
MS Teams has a wide variety of keyboard shortcuts, and not all of them could fit into this list. However, there are several ways of finding them in the app:
- You can press CTRL+. (period) to open a list of all available shortcuts.
- Alternatively, you can press CTRL+E to open Search and type in /keys.
- Finally, you can click on the ellipses in the upper-right corner that open Settings and go to Keyboard shortcuts.
17. MS Teams Tricks from Experts
Just like most Microsoft Office programs, MS Teams has a very user-friendly interface. Despite that, it can get overwhelming for new users to discover all the functions this program provides.
We’ve assembled a list of tips that will further improve your time with MS Teams:
- Modify your notifications. It’s okay if you don’t wish to be bombarded by alerts. To modify your notifications, select your profile in the top right corner. Navigate to the Notifications tab. You can change the appearance and sound of your alerts, their type, and even the emails you receive.
- Unsee some messages. Sometimes, you don’t have the time to address a question right away. MS Teams has a function for you to remember these messages – marking them as unread. Click on the three dots next to a message and Mark as unread in the drop-down menu. This way, it’ll be as though you’ve never seen it in the first place.
- Change your background. When joining a video call, it is essential to remain professional. This becomes tricky in a home setting. You can change your background to a custom image by clicking the ellipsis and selecting Show background effects. You will have a selection of images to choose from. Alternatively, you can click on Blur my background to make your surroundings less defined.
- Search everywhere. You can go to Search by pressing Ctrl+E. Type what you are looking for, and press Enter to look at the results. You can also use filters by switching between People and Files. If you can’t remember the wording of what you are looking for, you can try adding these before your search term:
In: Channel name or group chat name.
From: Person.
Sent: Date of the message.
Subject: Keyword from the message. - Try out Together Mode. It is a feature that places everyone in a shared background. This makes it appear as though all the participants are sitting in one place. It resembles a classroom or an auditorium. This mode is in the in-call background settings.
- Send urgent messages. Sometimes, a simple message just isn’t enough. You might need to ask a critical question or discuss a pressing matter. Instead of sending forty ignored messages in a row, check Important or Urgent below the text box. Once the message is sent, the person will receive a notification every two minutes for the next 20 minutes.
- Use the @mention function. It allows you to message someone directly. Add the @ symbol and type the name of the person you want to talk to. You can send them a quick message without having to open your conversation. You can also check out the messages sent to you. Navigate to the Activity feed, click on the Filter button, and select @mentions.
- Share documents with others. You will likely have to send and receive plenty of files over the Internet. Microsoft’s SharePoint is already integrated into MS Teams. It is a platform for sharing documents, and you can access it by going into Files. When the file is shared, other people can work on it too.
18. Organization Tips for Microsoft Teams
When you join a lecture or class in MS Teams, you don’t have to worry about running it. However, sometimes you will be assigned group projects. Or you might want to meet up with your classmates to study effectively. Whatever the case, you can organize your own online meetings.
Here, we’ll explain how to manage these events to ensure everything runs smoothly:
- Group team members
Keep track of who is doing what by assigning tags to team members. Add and change them in the MS Teams Options. - Title your chats and meetings
Titling makes it easier to come back to a chat and search through it. Click on the pencil next to the names to type in a title. - Create polls
Polling helps quickly establish opinions. Select the Forms icon to create a poll. Write the question and answer choices. You can allow Multiple answers and Anonymous responses. - Add to favorites
Keep conversations you access most at the top by marking them as favorite. Press on the ellipsis and select Favorite. - Try subject lines
Adding subject lines makes messages easier to find. Find them in the expanded view pane in the rich text editing by clicking Format. - Attach tabs
Tabs help connect users with essential files in other applications. Click Select (+) at the top of the channel and choose the one you need. Follow the steps listed, and the tab will appear at the top of the channel.
We hope that you found these Microsoft Office cheat sheets helpful, whether it is for your studies or other projects. If you think that these tips and tricks could be useful to someone else, make sure to share them around.
Thank you for reading!
🔗 References
- MS Office Cheat Sheets: Shortcut Keys – STL (Formerly Best Training)
- Microsoft Office Tips – Hampshire College
- Tips & Tricks: Microsoft Office 2010 – Wytheville Community College
- Regular Expressions Cheat Sheet by DaveChild – DaveChild, Cheatography
- Microsoft Word Tips – Accessibility and Usability at Penn State, the Pennsylvania State University
- The Ultimate Excel Cheatsheet – Investintech.com
![Changing Career Paths after Graduation… or Later [Guide + Infographic]](https://custom-writing.org/blog/wp-content/uploads/2021/09/Changing-Career-Paths-after-Graduation-or-Later-284x153.jpg)
![Being a Successful Online Student: 6 Must-Have Skills [Infographic]](https://custom-writing.org/blog/wp-content/uploads/2021/09/Being-a-Successful-Online-Student-284x153.jpg)

![Meeting Deadlines: A Comprehensive Guide [Tips & Infographic]](https://custom-writing.org/blog/wp-content/uploads/2021/07/flat-lay-desk-calendar-clock-284x153.jpg)
![Getting the Most Out of Career Fairs [The Complete Guide]](https://custom-writing.org/blog/wp-content/uploads/2021/07/company-representatives-reading-applicant-resume-hiring-284x153.jpg)